Winter Sales outfit no.1

14:13 Unknown 0 Comments


For me, the best part of the year is the very end- that oh-so-familiar post-Christmas period, when there is a bargain to be snapped up around every high street corner and a turkey sandwich to be eaten every lunchtime. It's something of a confusing time for fashion-lovers. A sort of awkward in-between period, the transition from Chrismtas jumper to regular jumper. Fortunately, the Sales provide an opportunity to restock the wardrobe with plenty of fresh winter wear. But this in itself also creates a problem- should you go for the incredibly low priced jeans from last season at H&M, or stay ahead of the game with the inconveniently non-reduced printed trousers from the new clothing range at Topman- for about three times the price of the aforementioned jeans.
The trick is to find the right balance. My suggestion: grab a few timeless items in the sale (eg: patent shoes, coloured skinny jeans, accessories, leather goods, plain leggings etc) then use the money you saved to buy some slightly more risque garments. Personally, I'd head to the highstreet for the bargains, then go somewhere like Camden market to get those fantastic, unique little gems that you never see anyone else wearing. To be honest, there's always a sale on at Camden market anyway- its called haggling!
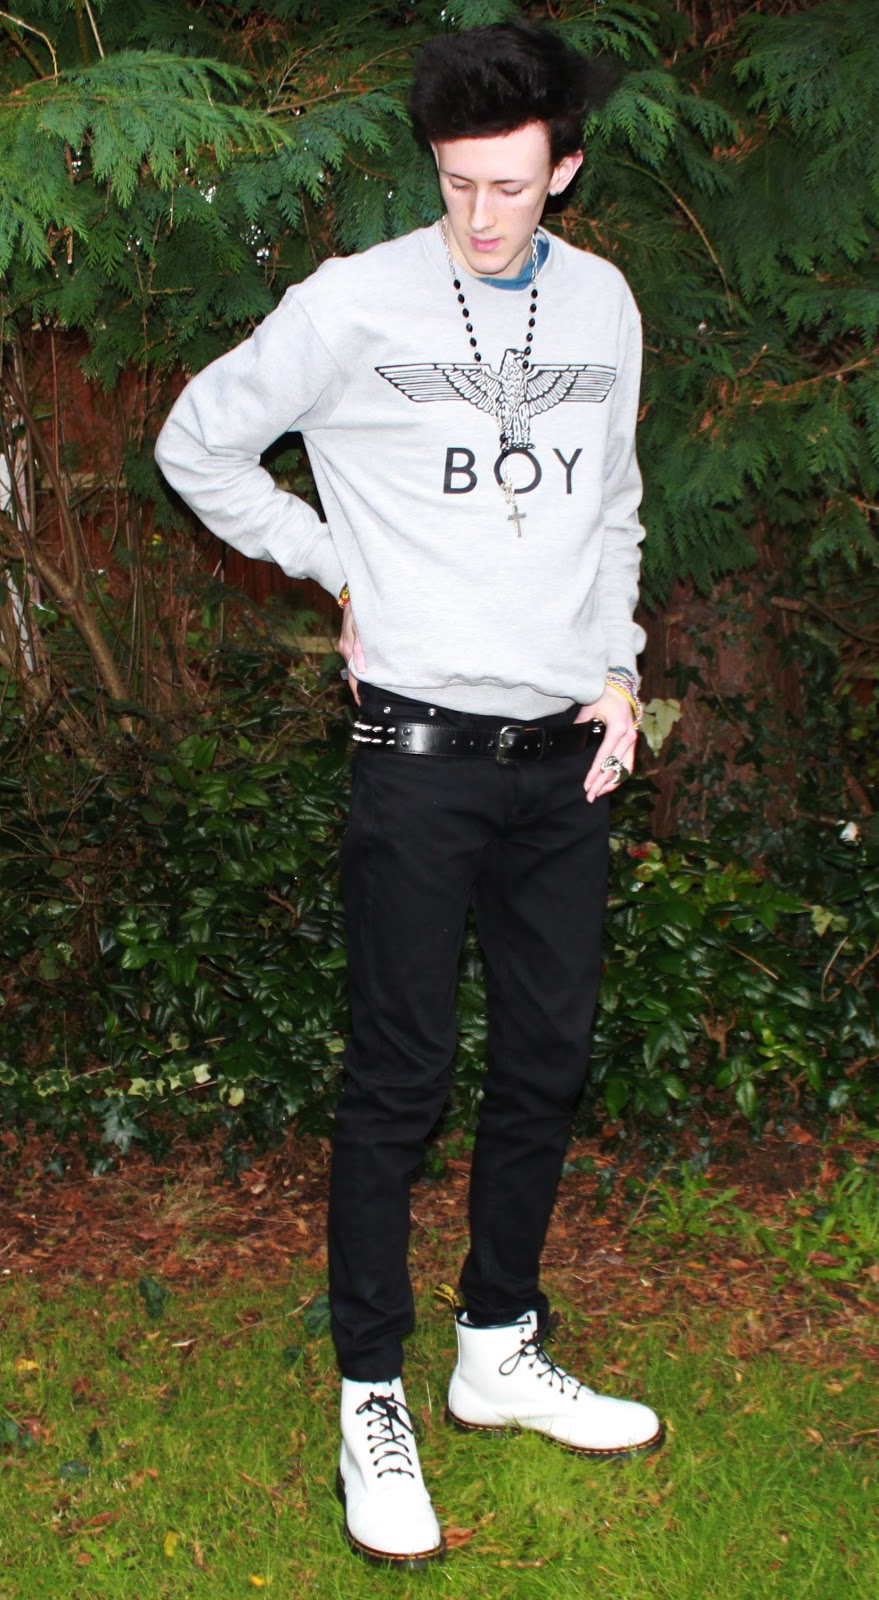
Anyway, I grabbed a pair of black stretch skinnies at H&M for £10- a very versatile garment, goes with anything light. I found this (fake) Boy London jumper in Camden for £15 (down from £18 after a little persuasion), and got the spiked belt at the same place for £12. The boots I've had for a while, but I know you can get them at Schuh for £59.99 (an excruciating reduction of 40% on the price I paid!).
Altogether the outfits pretty simple- I was forced to throw on a rosary style necklace and colourful bracelets to jazz up the look. Still, I think the grey and black go together very nicely, and the jumper keeps me warm on a chilly winter afternoon. I hope you like it! (here are some more pictures if you do...)




0 comments:

How to make a wallet out of fabric

05:19 Unknown 0 Comments

Another cheap and cheerful last minute gift idea of mine. After the popularity of my hand made bow ties among my friends, I thought I might try making something for my family as well. I decided on a wallet for my Dad, partly because I'm fed up of seeing his cards lying around everywhere, partly because wallets are so easy to make, and much more exciting than the boring leather ones you find in most men's clothing stores.
Here's how you make them. A word of advice before you start: I said 'last minute gift' earlier, perhaps 'last few hours gift' might have been a better expression. It's very important to take your time while your doing this, one small mistake could very easily ruin the whole thing, or at least make sewing the wallet very difficult (as I will demonstrate in my instructions).

1.

First of all (and easiest of all), roughly cut our a piece of card (card can come from anything as long as its a little bendy, I chose the cardboard sleeve of a ready meal) so that it is a little bit bigger than a credit card (or Costa loyalty card- they're all the same size after all).

2.

Next, cut out a rectangle of material, just over four times the size of the piece of card. It should be roughly 18 cm by 25cm before you hem the edges.

3.


Cut out a smaller rectangle from a differently patterned material. This rectangle, when hemmed, should be a little bigger than your cardboard cut-out.

4.


Sew your small rectangle onto the big rectangle, right side up. Make sure you only stitch around three edges, leaving the top one free- this is where you are going to put your cards in. Do this twice, as shown above.

5.

Cut out another piece of card identical to the first, and two rectangle of the same material as the big rectangle, which are a little bigger than the card shapes. Hem the material, then sew them onto the big rectangle, wrong side up, with the pieces of card sandwiched between the material.


The material should be sewn on so that it is above, and on the different side to the rectangles sewn on in step 4. If you fold the bottom left corner back, as I have done in the photo, you should be able to see the other material.

6.

Cut out two more rectangles from another material and hem the edges. When they are hemmed, they should be just a little bit bigger than a credit card.

7.

It's up to you how you want to embellish them- I chose to make a word- 'card'- just to remind the wallet-user what goes into the pockets. If you want to do a word like me, cut the letters out of the material, then sew another material onto the back (as show bellow), then put a few stitches in any flaps, like on my 'R' for example.


8.


Sew the materials as close to the edge as possible, leaving out the top part so that a card can go in. you can sew all the way through the material for the first pocket, as long as a card will still fit in.

9.

You're almost finished. All that's left to do is fold the shape in half so that one side is plain and the other side has the pockets on it. There should be a gap all the way across the top where you can put notes etc. Sew along the sides indicated in the picture by (cleverly inserted!) red lines. Fold again in the middle and the wallet is complete. If you want you can sew on a strap to fasten the wallet, but I chose to leave it open for ease of access. Now you've got your wallet, what are you waiting for? Get out into the sales!
 

0 comments:

Spice Up Your Life: Best Spice Girl Outfits

05:31 Unknown 0 Comments


The best way to celebrate the release of a new musical about the lives and careers of the Spice Girls?? Privately, that's for certain. Not many people view the Spice Girls as 'cool', in the same way they did 10 odd years ago. In fact, the last time I heard a Spice Girls song played in public was a charming rendition of 'Wannabe' by a ragtag assembly of middle aged Geography teachers at a school fund-raising talent competition. I've never heard, say, Move Over, played at party or club; but if such a song ever were to be played, no doubt it would incur some some discontentment among the listeners. And this, I think, is one of the greatest injustices of the 21st Century so far.
Perhaps it should be no surprise that I like the Spice Girls- I was born in 1994, the same year the Spice girls formed, Spice Up Your Life reached no.1 shortly after my third birthday, and the earliest Christmas no.1s I can remember were all Spice Girl songs. Hence I am so eager to celebrate the Girl's return to the pop culture limelight. 
Perhaps the best way for me to do this is through highlighting the best look for each Spice Girl. Admittedly, not all of their outfits were fantastic. Far from it: a lot of them were downright awful (images of a precursor to the leopard print onesie and awfully cut crop tops spring to mind). But, there were many outfits that stick out in my mind as embodying what the Spice Girls truly were: pure, shameless girl power. These are some of those outfits:

Scary Spice:


This skin tight, hooded, glitsy dress really compliments Mel B's curvey hourglass figure. The sparkly highlights are sublime, and the satin is gorgeous. You can't see it in this picture, but asian style hood at the top was very fashionable at the time (though reminiscent of something May Day- Grace Jones- wore in A View To A Kill in 1985). My only quarrel with the dress is that, if anything, it's too elegant- something Scary is not exactly remembered for.


 I couldn't resist bringing up this striking black and white dress worn recently by Mel B- and, as the perceptive ones among you will have realised, also by Alicia Keyes. Who wore it better? Personally, I think it hugs Mel B's curves beautifully, but makes Alicia's hips look a little too big. Also, although Alicia's footwear goes very nicely with the dress, she's gone for something a little too obvious. Mel B's golden plated heels look killer.

Ginger Spice:


Unsurprisingly, ginger really suits red. This sparkly, sequined dress is no exception- definitely my favourite look for Geri. The delta-shaped necklace goes excellently with the dress, filling up some of the space left by the considerably low cut neckline.


More evidence for the suitability of red (sadly, the light hit this one badly- one assumes the dress is suede).

Baby spice:


Emma Bunton, it cannot be denied, looks fab in little dresses of any colour- usually light blue or purple. In fact, she doesn't wear much else- I had to trawl through several pages of google image results before I found a snap, allbeit a flattering one, of her in trousers and a top. And even that was a recent picture. I would go as far to suggest that she spent the entire decade of the 1990s encased in a dress of some sort. And who could blame her when she looks so good? Let's not forget that she's called baby spice for a reason- she's not exactly blessed in the way of height. Long legs is a definite prerequisite of wearing trousers- on that is all the more essential when you're frequently under the glare of the world's media; a prerequisite Emma doesn't meet. But that's not a problem for her when she wears a dress- then the focus is on her gorgeous petite little figure. Furthermore, it cannot be said she relies too heavily on the cute little dress look, as she demonstrates her awareness of style and pattern combinations with a sophisticated striped, pointy-shouldered blazer. Babyliscious!

Posh Spice:


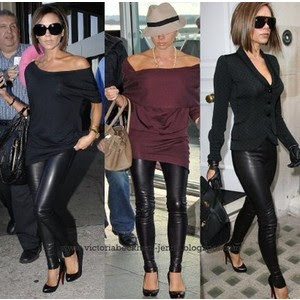
Choosing a best outfit for Victoria Beckham, who, let's not forget, is a fashion designer, was no easy task. Although she has a notable collection of beautiful, elegant dresses, it would be far too predictable to show a picture of posh in a dress. Rather, I thought I'd highlight the reason why she wears trousers and Baby doesn't: her astonishingly tall, thin figure. Her legs are begging to be covered in trousers, tight or loose. She can be a smart and sexy business woman when she combines white trousers with a prada-esque shirt, or go a bit more casual with shiny black zipped trousers with a flowing top and long grey scarf and perfectly matched flats. Also, leather and posh go together like Doc Martens and bleachers.

Sporty spice:


Admittedly, this was a particularly tricky one. Of all the Spice girls, Mel C is perhaps the least renowned for her sense of dress. She is, however, and always has been my favourite spice girl. Hence I was more than happy to sift through the endless photos of her in all manner of different coloured tracksuits until I finally found a look befitting of a pop legend. Fortunately for me, in more recent years, Mel has matured a great deal in terms of fashion. Perhaps since giving birth in 2009 she's been inspired to take a more traditionally feminine, almost maternal approach to style. This superbly simple, excellently fitted red dress with draped details gives Mel C a striking appearance and a clear, complimentary silhouette. The lovely studded boots show she's still got her rock chic edge, the black bag adds a touch of class. 

0 comments:

How to make a clip-on bow tie

13:33 Unknown 0 Comments

As usual, shortage of yuletide funds has meant that this year, I will be making presents for my friends. Whacking out a batch of Betty Crocker cookies seemed like the easiest option to me, but then I had a re-think. I decided that I wanted to get them something which had a bit more of my personality stamped on it. After all, this will be the last Christmas I spend with my friends before we all go to university next year, so I suppose in I way I want to give them something to remember our last Christmas together by. Aren't I cute!
So, anyway, as it's something I already know how to do, and it's something my friends know I like doing, I decided to make them all bow ties. But, because I didn't want to give them all the same thing, I put a little twist on the bow ties to jazz them up a little. I think they make really cute little gifts, and they're cheap and relatively easy to do. Here's how you can make them too:

You will need:


  •    A selection of printed fabrics. You will need at least two- personally, I would go for two clashing prints/patterns. I have used thin fabrics to make the bow tie light, and I have folded them multiple times (as you will see) to avoid interfacing.
  • Some clips. Regular hair clips will do- you could even use a hair comb. Using clips means the bow ties can be used for a variety of purposes- they can go in your hair or inside a collar. 
  • A sewing machine is highly recommended.
  • Needle and thread.
Method:

1.

Turn your material around and draw a rectangle of dimensions approx: 23cm by 16cm. Cut out- it doesn't matter if the cut is a little rough.

2.
Do the same for a second sheet of fabric, this time cut it into a rectangle approx 17cm by 12cm- you can alter these dimensions depending on how big you want it to be.

3.


Fold the rectangle lengthwise so that the right sides are facing outwards. Then fold in half as demonstrated.

4.
  
Do the same for the smaller rectangle. Pin the edges together to make sewing easier. You don't need to pin the edge where the two folds meet.

5.

Sew all the way around the edge where the edge is pinned. Leave a gap on the side where the folds meet so that you can turn the shape inside out. Do this for both rectangles.

6.

Use the hole to fold the shape inside out- this way the shape looks a lot neater. The corners can be tricky to turn, so I found using the end of a pair of scissors to push them through was very helpful.

7.

Sew up the hole you used to turn the material inside out. You should end up with two shapes like this (see above)

8.

If you're doing bow ties for a couple of friends, you could try mixing up some different combinations of clashing patterns, like beige zebra and polka dot, or paisley and leopard print (inspired, even if I do say so myself!)

9.

To make the centre piece of the bow tie, cut another rectangle from the outer bow tie material, about 5 cm in width and a few inches in height (it doesn't really matter how long it is, as you can cut it to size later). Fold twice in on itself to make a triple thickness strip and sew along the length of the material. You can do the same for other bow ties if you're making more than one- as you can see, I haven't been consistently accurate with the length:

10.

Take your bow tie body, place the smaller rectangle on top of the rectangle, as close to central as possible (like in step 8). Pinch the bow tie at the centre, making sure both the top and bottom rectangles are pinched. Sew through the centre several times, as demonstrated below.


(the large black spot is where I started sewing)

11.

Take the strip of material which corresponds to the material of the larger rectangle in the bow tie. Wrap it once around the pinch at the centre of the bow tie, and sew through the centrepiece in the same way you sewed through the pinch.


You might want to think about customising the bow ties to give them a more personal touch, as I have done for the bow ties I'm giving to my closest friends. I warn you though, it can be quite difficult to force a claw-backed stud through several layers of fabric. It might be advisable to punch through the material with a craft knife or the sharp end of some scissors first.


12.


Take a hairclip (curved ones work just as well) and push it through the centrepiece of the bow tie. Fix it into place with a few stitches, just so that it doesn't slip off. 

There you go! Your bow tie is complete. I made 15 of these babies for christmas presents, and it only took me a few days- doing an hour or two each day. Once you get the technique, you can whack them out in no time! I hope you enjoy making them as much as I did!

0 comments: